Productivity Tips
Whether you are a student or have a side hustle, productivity matters. There are numerous productivity tips and tricks for a Mac user, but let me share some of the tips and tricks that would be more relevant to you as a student.
1. Share Notes
Many students use Apple’s Notes app for taking notes on their Mac or iPad. And if you have ever been in need of sharing a note with your classmates, you can do so by easily sharing a link to those notes. Let’s learn how to do that in Apple Notes app on your Mac.
- Open the Notes app on your Mac.
- Click on the note to select it that you want to share. And then click on the share button.
- Click on Copy Link and then click on the email address or phone number field.
- Type the email address of the person whom you want to share the note with.
- Click on the permission.
- Select an option according to your preferences. Tip: If you don’t want anyone to edit the note, select People you invite can view only.
- Now click on Share to share the note with the person. Note: If you don’t want anyone to add a person to the note remove the tick mark next to the Anyone can add more people.
2. Use Voice Memos for Recording Lectures
Mac’s mic has improved a lot since the launch of the first Mac way back in 1984. You can now record your lectures natively while taking Notes on your Mac. Mac has an app named Voice Memos for recording audio on the go. Let’s look at how to use Voice Memos on your Mac.
- Launch the Launchpad from the dock on your Mac. (If icon is not visible in the dock, there are other ways to open launchpad).
- Locate the Voice Memos app and open it by clicking on it.
- Click on the red record button to start recording lectures right on your Mac.
- Once you’re done recording and want to save it, click on Done.
3. Replace Text Easily
One more handy feature of Mac that goes unnoticed by many people is the replace text feature. In other words, you can say this works like creating custom abbreviations. Let’s take a look at how to create and use them.
- Open the System Preferences on your Mac.
- Click on Keyboard.
- Now click on Text.
- Click on + to add a new replace text trigger word.
- Type the trigger word, and then double-click on the blank space next to it.
- Now type the sentence or phrase you want to replace the trigger word with and hit enter.
- Close the System Preferences window by clicking on the red dot. And the next time you type the trigger word and hit space it will be replaced with the phrase you just entered.
4. Use Split Screen
Using Split Screen can be really helpful at times especially when you are a student. Suppose you have two apps open on the desktop of your Mac. Here are the steps to use Split Screen on your Mac.
- Take your mouse pointer to the green dot and wait for a couple of moments.
- Click on the Tile Window to Left of Screen or Tile Window to Right of Screen. For example, I’m clicking on the left one.
- Once the left screen is occupied, click on the other app window to fit it to the right side of the screen.
- Now both apps are in split screen mode, you can continue to use them without any distraction.
5. Resume Safari Last Session
Many times you must have accidentally closed Safari and have lost all of your ongoing tabs. To deal with such unpleasant scenarios, you can enable a setting that allows you to resume your session after the accidental closing of Safari on your Mac. Let’s take a look at the steps to enable this in the Safari preferences.
- Launch Safari on your Mac.
- Click on Safari in the menu bar.
- Now click on Preferences.
- Once the Safari preferences open, navigate to the General tab and click on the drop-down menu called Safari opens with.
- Choose All windows from last session by clicking on it. That’s it, now if your Safari gets closed accidentally, it will restore all your sessions or tabs from the previous session. Note: This can restore only normal windows and tabs. Incognito windows are restricted to do so.
Finder Tips
Finder is an app that as a student you are going to encounter daily for managing files, folders, or even projects. Finder offers some of the best features for managing and organizing files and folders on Mac. Let me share some of the best Finder tips and tricks that you can use as a student to manage and organize your files and folders more effectively.
6. Create Custom Tags
Finder allows you to create custom tags for a better organization of the files on your Mac. You can use this feature to create custom tags like lectures, projects, semesters, etc. Follow these simple steps to create custom tags on your Mac.
- Click on the Finder in the menu bar and then click on Preferences.
- Finder Preferences will open in a small window. Click on Tags.
- Click on the + to create a new tag.
- Now type in a name for the newly created tag. For example, I’m typing Lectures.
- Take your mouse pointer to the circle next to the newly created tag and click on it.
- Select a color for the tag by clicking on it. Now the tag has been created. Let’s take a look at how to add a tag to the file.
- Locate the file in the Finder and right-click on it. Click on Tags.
- Click on the newly created tag to add it to the file.
7. Use Filter While Searching in Finder
Do you use Finder for searching files on your Mac? If yes, Finder allows you to add additional filters while searching for any files and folders which is extremely helpful if you have tones and tones of files stored on your Mac.
- Open the Finder and click on the search bar.
- Type the text or file name that you want to search for and hit enter. Once the search result appears, click on the + to add a filter to your search result.
- Click on the filters and select according to your preferences to refine the results. You can filter out results by name, date, kind, etc.
8. Rename Multiple Files at Once
Renaming numerous files at a time can be very exhausting. Fortunately, renaming multiple files at once on Mac is effortless. Take a look at the simple steps to rename multiple files at once.
- Locate the files that you want to rename and select them all with the help of your mouse.
- Right-click on the selected files. Click on Rename to begin.
- You can choose multiple types of renaming formats. To do so click on the drop-down menu to expand it and show multiple formats of renaming. Note: Depending on the usage of your Mac the drop-down menu may show different names such as Replace Text, Add Text, or Format.
- Select the formatting option that you want. For example, I’m clicking on Format. Tip: If you replace some text from the names of the files, select Replace Text. If you want to add text before or after the name of the files, select Add Text. If you want to completely change the name of the files select Format option.
- Customize the new name for the files from the pop-up and then click on Rename to rename all the files according to your selected preferences.
9. Delete Items Without Sending them to Trash (Bin)
The normal delete process on Mac sends the deleted files to the Bin. But if you don’t want to delete a file two times i.e, the first time from the Finder and the second time from Bin, you can permanently delete a file on your Mac without sending them to the Bin. Here are the steps to follow.
- Locate the file/folder in the Finder and select it by clicking on it.
- Now press the Opt + Cmd + Delete keys simultaneously on your keyboard.
- A pop-up will appear on the screen, click on Delete to permanently delete the file/folder.
Utility Tips
In Utility tips, we will be sharing some useful tips and tricks that will be super useful while navigating through your Mac. Implementing these tips and tricks will help you in saving a few clicks and keys in everyday workflow.
10. Use Stack on Desktop
If you use the Desktop location on your Mac just like many students out there to constantly transfer files in and out of your Mac, chances are that it would be messy. In such a scenario, let me share an awesome hack with you that will save you from cleaning your Desktop in just a few clicks.
- Right-click anywhere on the Desktop.
- Click on Use Stacks.
- All the files and folders will now stack on top of each other and your desktop will look clean and organized now.
11. Remove Unwanted Icons From Menu Bar
Many students like to install multiple apps on their Macs. As much as apps are helpful they can also be overwhelming for your Mac’s menu bar making it look full and all cluttered up. And going to each and every app and disabling them on the status bar from their settings can be very tiresome. Let’s take a look at how to easily get rid of those unwanted icons from the menu bar on your Mac.
- Hold the Cmd key on your keyboard.
- Now click and drag the icon toward the desktop (or away from the menu bar) that icon that you want to remove from the menu bar.
- Once you see the X just drop or leave the icon and it will get removed from the menu bar of your Mac.
12. Add a Folder to the Dock
Wouldn’t it be great to access your most used folder directly from the dock of your Mac? If you are also thinking of a way to make it possible, look no more. Let me show you the steps to add your most used folder to the dock of your Mac.
- Locate the folder in the Finder.
- Now click and drag that folder toward the dock.
- Once the folder is above the dock, just drop it and it will be added to the dock. Now you can quickly access that folder and its contents from the dock, without going to the Finder.
13. Powerful Trackpad Gestures
Mac’s trackpad gestures are some of the handiest and most useful ones. If you were not using them till now, this is your call to activate them and use your Mac to its full potential. Let’s take a look at how to enable these trackpad gestures on your Mac.
- Click on the Apple logo and then click on System Preferences.
- Once the System Preferences is open, click on Trackpad.
- There are three types of gesture categories, i.e, Point & Click, Scroll & Zoom, and More Gestures. Click on each of them to enable the desired gesture to get the most out of your Mac. Tip: Access Launchpad by Using Trackpad Gesture on Your Mac.
14. Use Spotlight for Faster Calculations and Conversions
Spotlight is an extremely powerful search tool that’s present on your Mac. From finding files that you worked on last week to finding something online, Spotlight can save you a lot of time. But very few people know that you can use Spotlight search for doing maths calculations, unit conversions, and even currency conversions. Let’s take a look at how to do so.
- Press the Cmd + Space keys on your keyboard to open the Spotlight search on your Mac.
- Type the calculation prompt in the Spotlight search. For example, I’m typing to do a simple multiplication without opening the calculator.
- You can also try currency conversions in the Spotlight search just like this. You just need to type the prompt and Spotlight will show you the result in an instant.
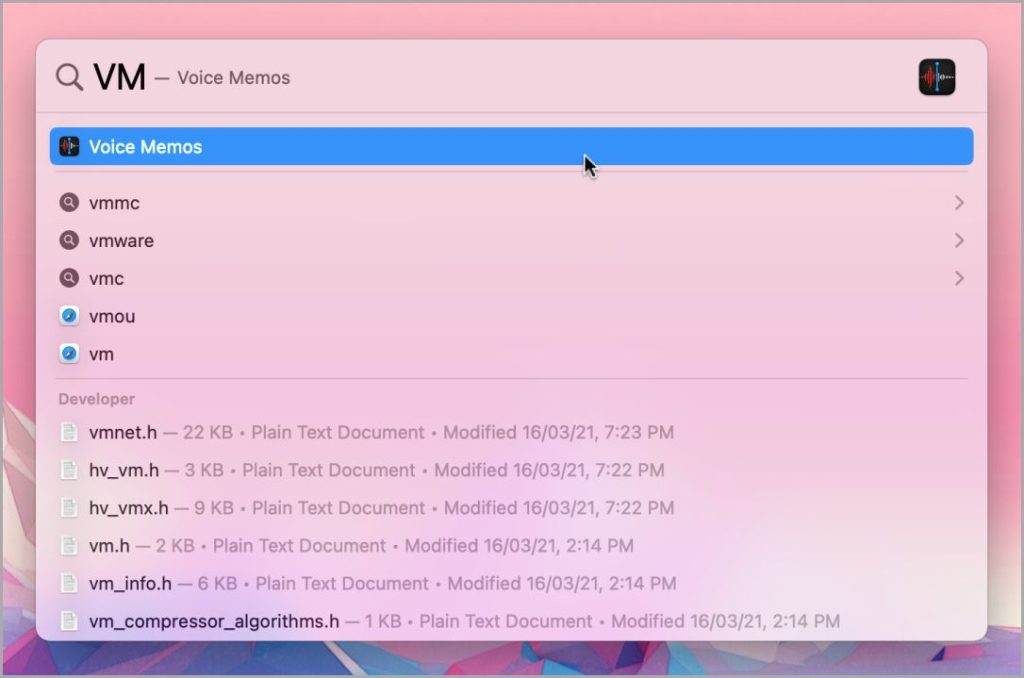
15. Search for an App Faster
You can also use the same Spotlight to search for an app faster. It will save you the hassle of launching Launchpad and finding the app in it. Let me show you the steps to do so.
- Press the Cmd + Space keys on your keyboard to summon the Spotlight search on your Mac.
- Now type the app initials in the Spotlight search to quickly search for the app. For example, I’ve typed FCP for Final Cut Pro and VM for Voice Memos.
16. Kill Unresponsive Apps
Many times an app gets becomes unresponsive and stuck on Mac. This can sound like a nightmare to students. In that case, I would suggest killing such unresponsive apps to get your Mac back up and running. Here are the steps to do so.
- Click on the Apple logo, to begin with.
- Now click on Force Quit.
- Click on the application that you want to force quit to select it and then click on Force Quit.
- A pop-up will appear on the screen, click on Force Quit to quit the frozen app on your Mac.
Some More Tips
Here are some more tips that are going to help you with your Mac a lot. These are many things that you as a student may be doing repeatedly with your Mac. And with some fine-tuning, it can be more helpful to you. Let’s take a look at some of these tips.
17. Take Screenshots and Annotate Them Natively
Screenshots are very helpful in grabbing something useful from a website or an article. But in order to keep a screenshot relevant and useful you need to annotate them properly. Let’s take a look at how to take a screenshot and annotate them natively on your Mac.
- Press Cmd + Shift + 3 on your keyboard to take a screenshot on your Mac.
- Click on the screenshot preview near the bottom right corner of the screen to open the screenshot editor.
- Now click on the annotate tool in the screenshot editor.
- Select a tool for annotating the screenshot by clicking on it. For example, I’m proceeding with the rectangular annotation tool.
- Annotate the screenshot with the help of your mouse. Once done editing click on Done to save the screenshot.
18. More Screenshot Options
Mac also provides you with more options to capture a screenshot or screen recording natively without installing any third-party apps. These additional options can be really helpful at times. Let’s take a look at how to summon them when needed.
- Press Cmd + Shift + 5 on your keyboard to summon the screenshot toolbar on your Mac.
- You can choose to screenshot or screen record from here also. Click on Options to show more options.
- A menu will open, you can choose to have a timer, change the location of screenshots and even show or hide mouse pointers from here.
- You can also partially record or take a screenshot of the screen on your Mac by clicking on these two options.
19. Do Minute Adjustments
Did you know that you can now do minute adjustments to sound levels and brightness on your Mac? The answer is yes, this is a much less known tip that very few Mac users know of. Here are the steps to do minute adjustments while adjusting sound levels, brightness, and even keyboard backlights.
- Press the volume up/down button to adjust the volume.
- Now hold the Shift + Opt key on the keyboard and press the volume up/down button to do the minute adjustments. Instead of increasing or decreasing one-stop, it will change by 1/4th of a stop. Tip: You can do the same with the display and keyboard brightness as well.
20. Reveal Hidden Options
There are many useful options that are hidden in macOS. Once you know how to access them on your Mac, many of your workflows would get simple and easy. Let’s learn how to access or reveal some of those hidden options on your Mac.
- Locate a file/folder in Finder on your Mac and right-click on it.
- Now just press the alt-option key on the keyboard of your Mac to reveal more options. As you press the key, some new options will get revealed to you.
MacBook Tips and Tricks for Students
We hope these MacBook tips and tricks for you, the students, should help significantly enhance your productivity, organization, and overall user experience. Using MacBook correctly can help you become efficient and tackle your academic tasks with ease. So, give them a try, and see how they can transform your studying experience for the better.